Due to mysterious reasons, I have lately interested myself in old Mac hardware. I suddenly have some PowerPC based iMacs in my basement.
I have never been a Mac user, not even during the later i386 era, but I have always been a big fan of Mac hardware.
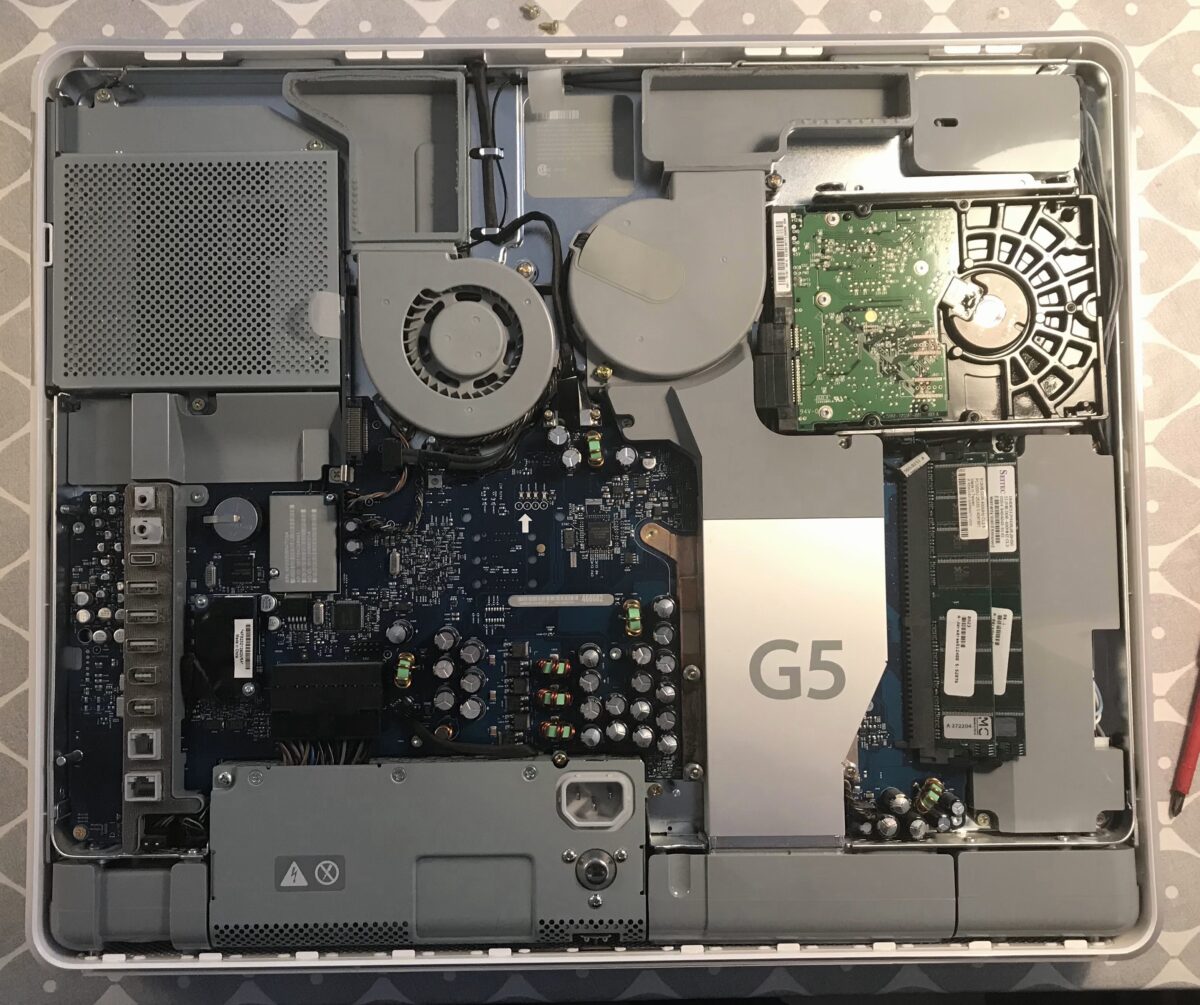
During my journey learning about Mac OS X versions, I decided to change to a SSD hard drive to speed things up a bit.
The number one rule of disassembling any Apple hardware is to do you research. I found some information about early iMac version that required you to use a credit card to snap up hidden plastic connectors, but my version of iMac was surprisingly easy to open.
To open up the iMac:

- Place you iMac with the screen down a table.
- Fully untighten the three screws in the bottom mesh. The mesh or the screws will not come off, they just operate the internal lock mechanism.
- Lift off the back if the iMac starting at the bottom end. There are some plastic connectors at the top, but in the right angle you can just lift the back off.
Then its time to replace the hard drive:
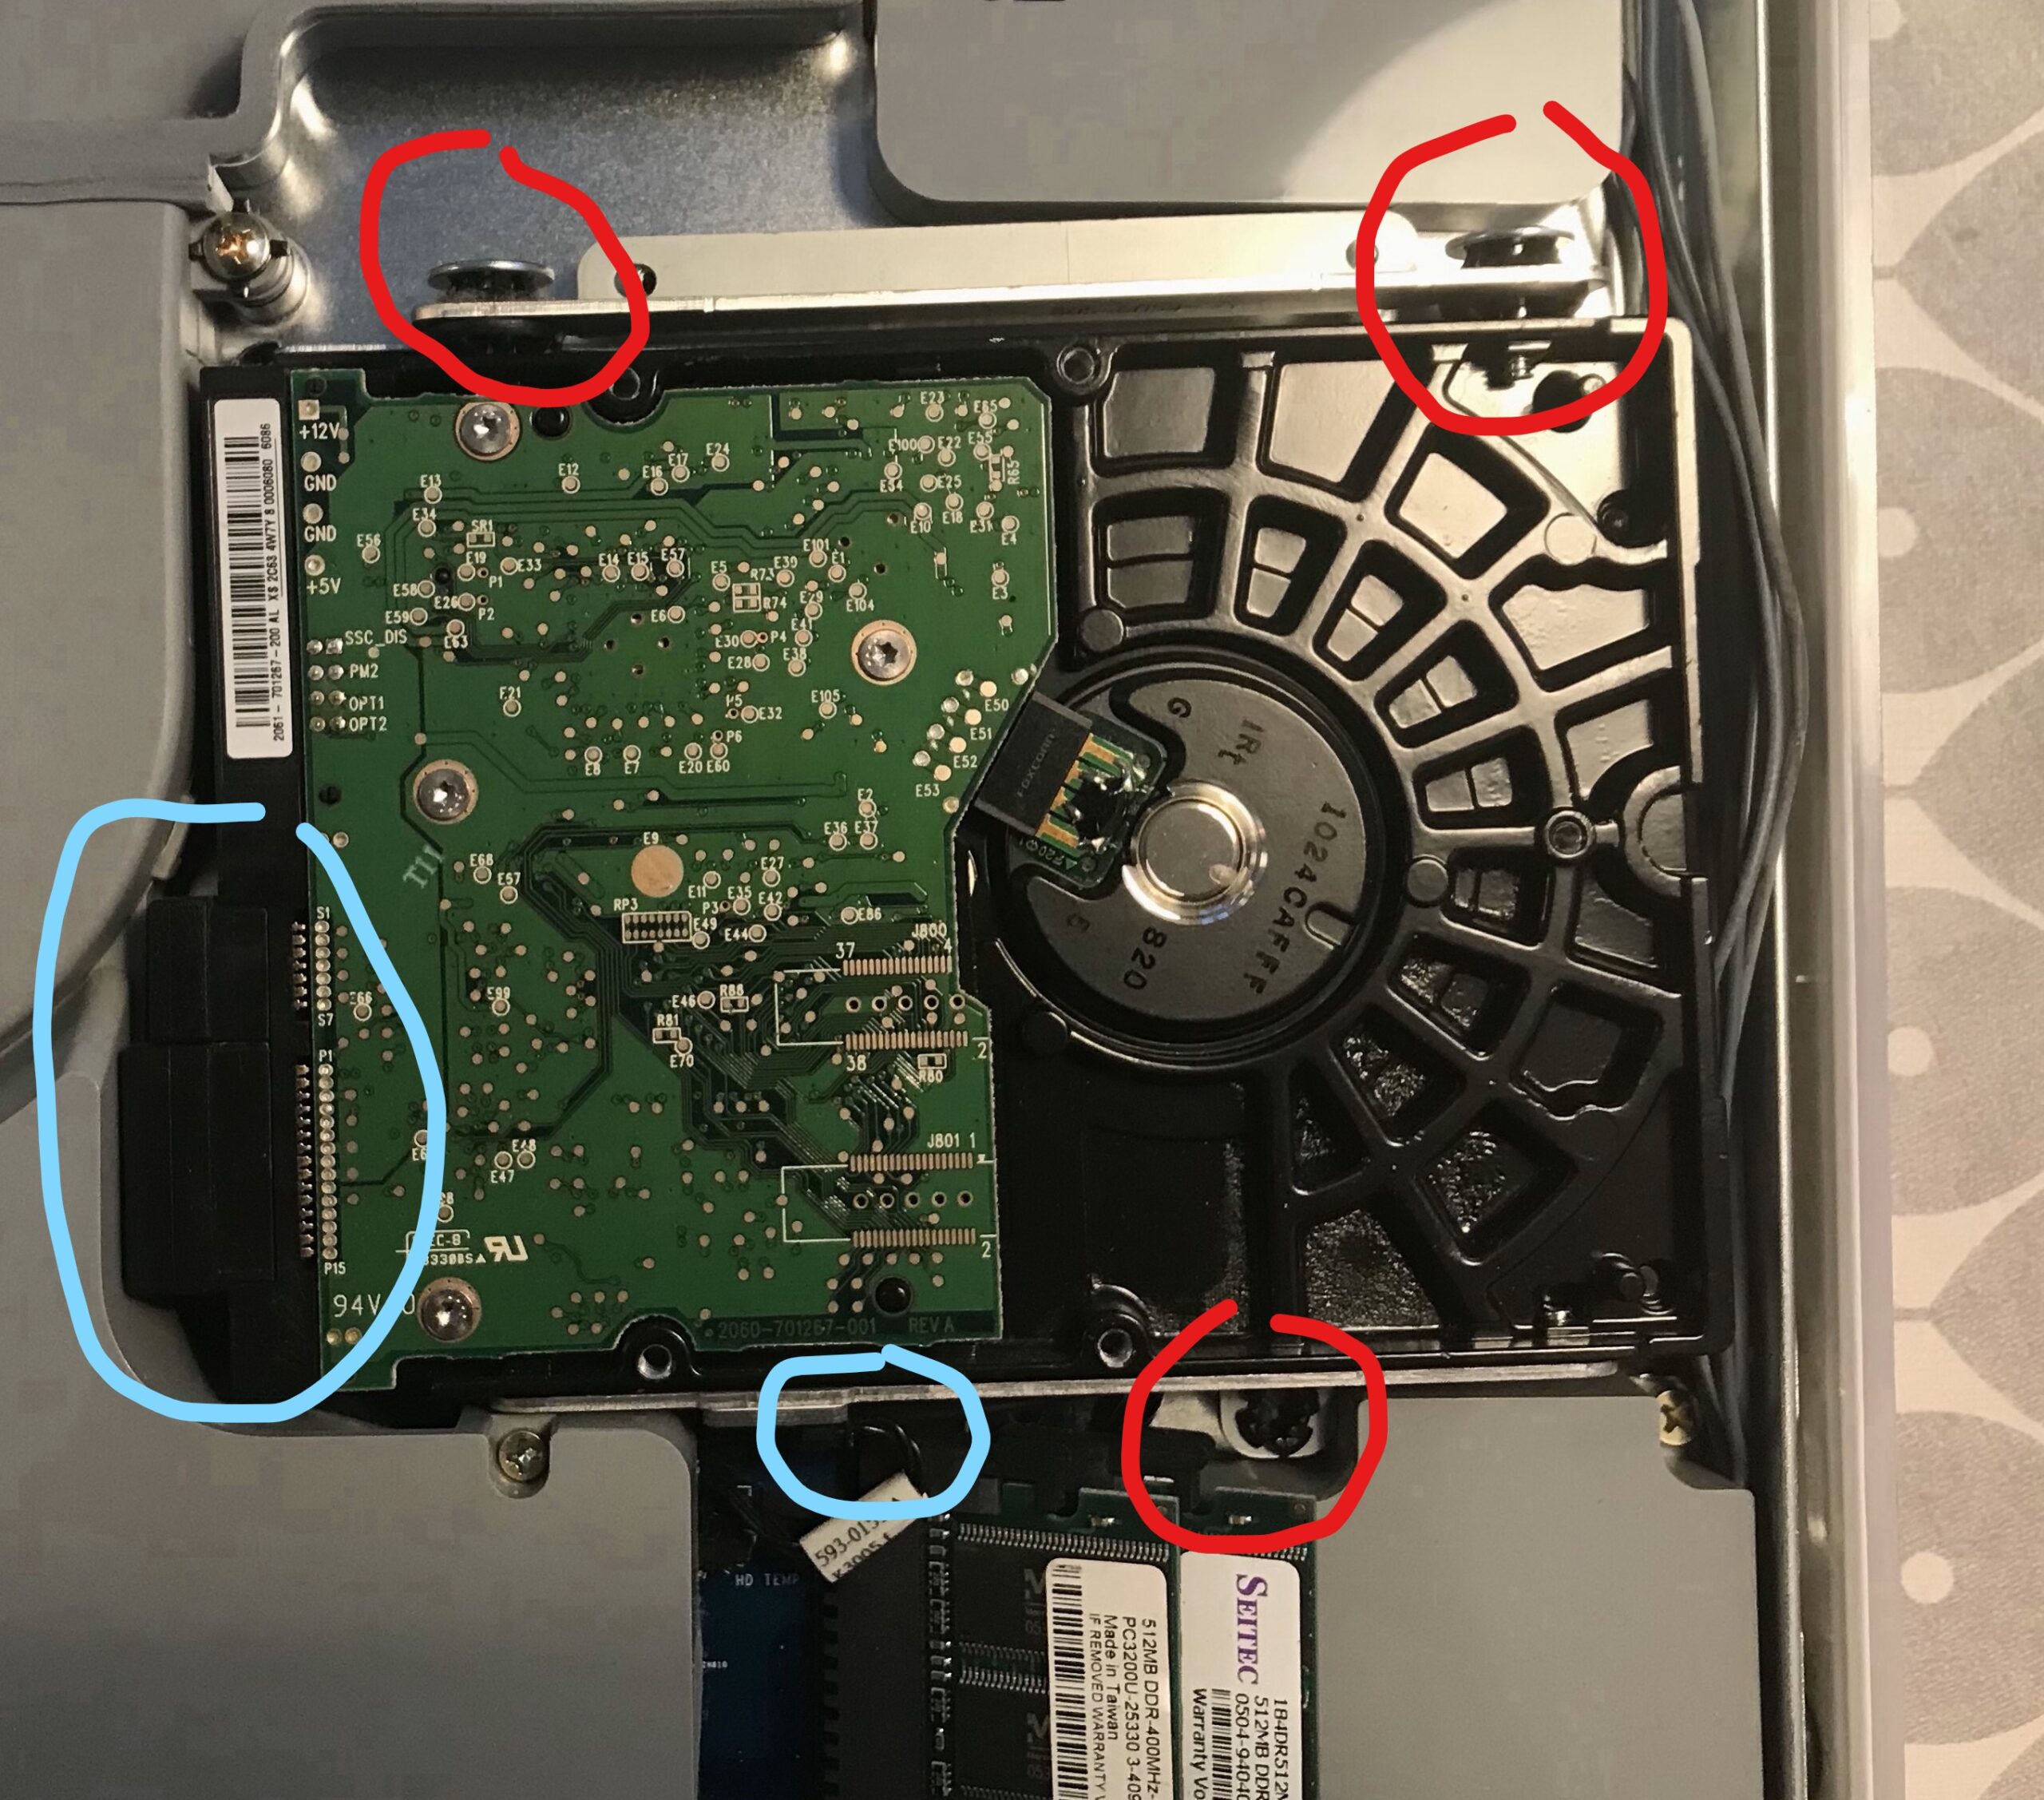
- Disconnect the SATA cables. There is just enough room to pull them off (blue).
- Disconnect the HDD drive temperature sensor cable. This one is a little tricky, be careful (blue).
- Unscrew the three screws holding the hard drive (red).
- Move the hard drive mounting brackets to the new hard drive.
- Screw everything back.
To put back the back cover again:
- Start with aligning the back cover into the plastic connectors in the top. Hold the back cover at about 45 degrees angle when doing this.
- When the top of the cover is properly aligned, turn is down until it rests at the correct place.
- Tighten the locking mechanism controlled by the three screws in the bottom mech.
Enjoy your born-again iMac!
